Search This Blog

Showing posts with label Dessert. Show all posts

Peppered Balsamic Strawberries and Zabaglione

From 1999 Disney Institute “Taste of the World: Italia Cucina” Class

Serves about 6

 (I had intended to make this so that there would be some pictures, but I just didn’t get around to it. I will update with pictures in the future.)

Ingredients:

3 pints strawberries (good and ripe)
3 tablespoons balsamic vinegar (really good quality)
1 tablespoon water
3 tablespoons granulated sugar
1/2 teaspoon black pepper, freshly ground

Zabaglione:
6 egg yolks
1/3 cup granulated sugar
1/2 cup Marsala wine (sweet)*
Salt

*Other options: sherry, Madeira, sparking or dessert wines, bourbon, rum, Calvados or Frangelico.  Citrus juice and zest or spices may also be added along with the wine.


You will also need:

Heat proof mixing bowl and pan of simmering water (double boiler type set-up)


Method:

Strawberries:  Trim the tops from the strawberries.  Cut the berries into quarters and place in a mixing bowl.  Add the balsamic vinegar, water and sugar.  Stir gently to evenly coat the berries with the vinegar mixture.  Add freshly ground pepper (1/4 – 1/2 teaspoon to taste).  Allow to stand at room temperature for one hour for sugar to fully dissolve and flavors to blend.

Zabaglione:  In a heat-safe mixing bowl, combine the egg yolks, sugar, and salt.  Whip with a wire whisk until the eggs are pale and creamy, about 3 minutes.  Slowly add in the marsala wine. 

Place the bowl over gently simmering water (water should not touch the bowl). Continue whisking until the custard is thick and doubled in volume, 5-8 minutes, or just until it holds its shape.

To serve: Be creative with presentation.  Possibly layer strawberries and Zabaglione in a wine glass or spoon some of the strawberries into an ice cream dish and top with Zabaglione. 

The Zabaglione pairs well with any fresh fruit (berries and stone fruit especially) or even poached pears.  You may also serve with biscotti or other cookies for dipping.

Simple Chocolate Cake

from Cook’s Illustrated (March/April 2009, pg. 25)

Updated with pictures.

IMG_1337

This is a surprising little cake.  And the surprise is mainly because of one ingredient - mayonnaise.  NOT “salad dressing,” mind you.  No.  The real stuff.  Mayonnaise.  It was a method used in war-times when butter and eggs were scarce; the mayonnaise served as a substitute for those ingredients.  This is not a fancy dancy, decorate up with fondant and buttercream icing kind of cake. But it is definitely simple enough for a week-night dessert.

Ingredients:

1 1/2 cups (7 1/2 ounces) all-purpose flour
1 cup (7 ounces) sugar
1/2 teaspoon baking soda
3/4 teaspoon table salt
1/2 cup (2 ounces) Dutch-processed cocoa powder (or “Special Dark”)
2 ounces dark, bittersweet or semisweet chocolate (chopped fine)
1 cup hot coffee (or equivalent mixture of hot water and espresso powder)
2/3 cup mayonnaise
1 large egg
2 teaspoons vanilla extract

You will also need:

8 inch square cake pan
Non-stick cooking spray
1 large mixing bowl
1 small-medium mixing bowl
Confectioners’ (powdered) sugar for garnish


Method:

Preheat oven to 350 degrees F and prepare cake pan by spraying with non-stick cooking spray.

In large mixing bowl, whisk together flour, sugar, baking soda and salt.  In smaller bowl, combine cocoa powder and chopped chocolate; pour hot coffee over cocoa/chocolate mixture and whisk until smooth.  Let this mixture cool for several minutes then whisk in mayonnaise, egg and vanilla.  Pour mayonnaise/chocolate mixture into flour mixture and stir until combined.

Scrape batter into prepared pan and smooth it all around.  Bake for about 30-35 minutes or until toothpick comes out with few crumbs attached after being inserted into the center of the cake.  Note:  the cake will have a nice rounded domed middle and cracks on the top.  This is normal.

Allow cake to cool in pan on wire rack for 1-2 hours.  Turn cake out  onto serving platter and dust with confectioners’ sugar to serve.

Simple chocolate cake made with mayonaise

IMG_1328

IMG_1336

Minny’s Chocolate Pie

Adapted from August issue of Food and Wine (as credited by several blogs)

Minny's Chocolate Pie

You know… from the movie “The Help.”  Yeah.  THAT chocolate pie.  But without Minny’s special ingredient. :)

This pie is so easy.  And you won’t believe how delicious it is. 

Ingredients:

Single pie crust
1 1/2 cups granulated sugar
3 tablespoons unsweetened cocoa powder
4 tablespoons unsalted butter, melted
2 large eggs, beaten
3/4 cup evaporated milk
1 teaspoon vanilla
1/2 teaspoon salt
Whipped cream for serving


You will also need:

9” pie plate (I used the shallow glass kind, not a deep dish)
Parchment paper (or foil)
Pie weights or dried beans


Method:

Preheat oven to 350°F. 

Place pie crust in pie plate and crimp edges decoratively as desired.  Prick bottom of crust several times with a fork, line with parchment paper (or foil) and fill with pie weights or dried beans.  Par-bake the crust for 15 minutes or until set.  Remove from the oven and carefully lift out the parchment paper with weights and set aside.  Return to the oven and continue to bake for 5 minutes longer, just until the crust is dry but not browned.  Remove from the oven, but leave the oven on at 350°F.

While the crust is baking those last 5 minutes, in a bowl, whisk sugar and cocoa powder together.  Add the melted butter, eggs, evaporated milk, vanilla and salt and whisk until smooth.

Pour the filling into the pie shell.  Bake 40-45 minutes, until the filling is set around the edges but jiggles just a little in the center.  If you feel the crust is getting too brown in the process of baking, you may cover it with strips of foil or pie guards about half way through. 

Cool completely on a wire rack before serving.  Serve with a dollop of freshly whipped cream.

It can be made ahead of time, cooled completely, covered with plastic wrap and refrigerated over night.

Double Pie Crust

If you need a single pie crust, just cut the recipe in half or, you know,  just make two pies.  Two is always better than one.


Ingredients:

2 1/2 cups all purpose flour
1 tablespoon granulated sugar
1 teaspoon salt
1/2 cup cold shortening (Butter Flavor Crisco)
1/2 cup (1 stick) cold unsalted butter
1/4 cup cold Vodka (optional)*
up to 1/4 cup ice cold water*

*or up to 1/2 cup ice cold water if Vodka is not being used


You will also need:

Food processor (optional)
Large, wide bowl
Kneading and rolling surface (counter top will do…. just needs to be clean)
Rolling Pin


Method:

Measure out shortening, cut butter into small pieces and measure Vodka and water.  Place shortening and Vodka in the freezer and cut up butter and water in the refrigerator.

If using a food processor:  Process flour, sugar and salt for several seconds until thoroughly combined.  Add chilled shortening and process using several 1 second pulses until it resembles coarse meal.  Add half of the chilled butter pieces and process for several 1 second pulses. Add the rest of the chilled butter and process for only a few 1 second pulses.  You should end up with some slightly smaller and some slightly larger pieces of butter. 

Empty contents into large bowl and proceed with steps below.>>>>

Without a food processor:  In a large bowl, add flour, sugar and salt; mix thoroughly with a whisk until sugar and salt are evenly distributed throughout the flour.  Add the shortening and with your fingers break the pieces apart and work into the flour until the combination resembles coarse meal.  Next add the cold butter pieces just a few at a time and work in a similar fashion until the pieces of butter are small gravel to pea size.

>>>>Add cold Vodka or 1/4 cup of cold water and work in with a bowl scraper.  Gradually add the remaining 1/4 cup of cold water until the dough begins to come together and sticks together when pressed against the side of the bowl. 

Pour contents out onto a floured work surface. Knead by simply folding the dough on top of itself a couple of times until it really comes together.  Form into a ball and cut in half.  Wrap each half in plastic wrap and refrigerate at least 1 hour before rolling out to place in pie plate.

Cream Cheese Sugar Cookies

This is an updated twist on my original Sugar Cookie recipe.  Click on the link to see the original recipe that includes some tips that I have learned through a little experience.

IMG_1065

Ingredients:

5 cups all-purpose flour
2 tablespoons baking powder
½ teaspoon table salt
2 sticks (8 ounces) unsalted butter
4 ounces cream cheese
3 eggs
1 ½ cups white granulated sugar
2 teaspoons vanilla


You will also need:

Stand mixer
Plastic wrap
Rolling pin
Cookie cutters
Parchment paper
Cookie/baking sheets


Method:

Allow butter, cream cheese and eggs to come to room temperature.

In a bowl, mix together flour, baking powder and salt.

In a stand mixer, using the paddle attachment, combine and soften the room temperature butter and cream cheese. Add in eggs one at a time mixing well to combine each addition. Add in sugar and vanilla and mix well to combine.

Add in the flour mixture a little at a time and combine completely. The resulting dough should be fairly stiff and not sticky to the touch.

Divide dough into three parts and wrap each individually (tightly) in plastic wrap. Refrigerate the dough for a minimum of one hour and up to a day or so.

When ready to cut your cookies, take out one disk of the dough. Using a lightly floured surface, roll the dough to 1/4” – 1/6” thickness. (If the dough is too thin, they will not be as soft.) Cut the cookies and place them on a parchment lined baking sheet. Place cookies in the freezer while you preheat your oven to 375°F.

Place cookies on the sheet directly in the oven right out of the freezer and bake for 6-8 minutes; the tops will be firm to press and just before the edges turn light brown.

Allow the cookies to cool completely before decorating.

Four Berry Sorbet

Adapted from Alton Browns fresh fruit sorbet recipe

Nothing says summer like berries… and nothing says summer like ice cream.  Combine the two and you have a four berry sorbet that will knock your socks off.

The vodka is probably optional, but I think it lowers the freezing temperature and makes for a smoother sorbet.

Frozen unsweetened berries are an option for this recipe if fresh are not available.  Allow them to thaw a bit first, though.


Ingredients

6 oz raspberries
6 oz blueberries
6 oz blackberries
14 oz strawberries
8 ounces sugar
1 ounce freshly squeezed lemon juice or lime juice
1/2-ounce vodka
Pinch kosher salt


You will also need:

Paper towels
Rimmed baking sheets
Food processor or blender
Ice cream freezer
Airtight  and freezer safe containers


Directions

Rinse all berries and allow to dry on paper towel lined rimmed baking sheets. Also stem and halve (or quarter) large strawberries. 

Puree the fruit in a food processor or blender along with the sugar, lemon juice, vodka and salt. Strain through a fine mesh strainer, using a rubber spatula to press the puree through the strainer.

Pour into a bowl. Cover and refrigerate until the mixture reaches at least 40 degrees F, 4 to 6 hours.

Churn in an ice cream machine according to the manufacturer's instructions until the mixture resembles soft serve ice cream. Remove into an airtight container and freeze for at least 4 hours or until ready to serve.


And the recipe in pictures….

Rinse berries and dry on a paper towel lined rimmed baking sheet.

IMG_0007

I put as many berries in as possible and then add in the lemon & lime juices plus the vodka and then top with as much sugar as will fit.  Pulse the blender several times then add the rest of the berries as they will fit.

IMG_0008

As you can see, the completely blended berry mixture completely fills my blender.

IMG_0010

Stir and press through a fine mesh strainer to remove seeds and solids.

IMG_0011 IMG_0012

The strained puree.

IMG_0013

This is my best friend in the summer time.  I love my Cuisinart ice cream maker.

IMG_0016

Allow your ice cream maker to do its thing until it becomes a nice and thick soft serve consistency.

IMG_0017

The color is beautiful and the taste is even more amazing!

IMG_0014

My Favorite Chocolate Cake (and the Chocolate Peanut-butter Cake variation)

From Cook’s Illustrated (#79, March/April 2006)

Once you make this chocolate cake one time, you’ll realize how easy it is to make a fresh, homemade, not from a box delicious chocolate cake that has such good chocolate flavor that… well… you may be ruined like I am and never want to go back to a box again.


Ingredients:

12 tablespoons (1 1/2 sticks) unsalted butter, very soft
1 3/4 cups (8 3/4 ounces) unbleached all-purpose flour
4 ounces unsweetened chocolate, coarsely chopped
1/4 cup (3/4 ounce) Dutch-processed cocoa powder
1/2 cup hot water
1 3/4 cups (12 1/4 ounces) sugar
1 1/2 teaspoons baking soda
1 teaspoon table salt
1 cup buttermilk
2 teaspoons vanilla extract
4 large eggs, plus 2 large egg yolks


You will also need:

1 tablespoon butter for greasing pans
1/8 – 1/4 cup flour for dusting pans
Baking pan (1 – 9x13, 2 or 3 9-inch round)
Stand mixer (whisk and paddle attachments needed)
Double boiler set-up (or small sauce pan and heat-proof bowl)
Extra bowls
Scraper/spatula


Method:

Preheat oven to 350 F.  Grease pan(s) with butter and dust with flour.

Combine chocolate, cocoa powder and hot water in heat-proof bowl & set over sauce pan containing 1 inch of simmering water.  Stir with rubber spatula until chocolate is melted.  (This mixture will be very thick and dull.)  Add 1/2 cup sugar and stir until a little more fluid and glossy.  Remove bowl from heat and set aside to cool.

Whisk flour, baking soda and salt in medium bowl. 

Combine buttermilk and vanilla in a separate bowl. 

In the bowl of a stand mixer with whisk attachment, whisk eggs and yolks on medium-low speed until combined (about 10 seconds).  Add remaining 1 1/4 cups sugar and increase the speed to high and whisk until fluffy and lightened in color. (Not the same fluffy as when you cream sugar/shortening.  I would describe it as aerated and thick such that you can see the lines that the whisk leaves as it runs.)  Remove whisk and attach paddle.  Add the cooled chocolate mixture to egg/sugar mixture and mix on medium until thoroughly combined, pausing to scrape down the sides of bowl with rubber spatula if needed. 

Add softened butter one tablespoon at a time, mixing about 10 seconds after each addition.  (You will see some very small pieces of butter in the batter.  They will not completely incorporate.)  Add about 1/3 of the flour mixture and 1/2 of the buttermilk mixture, mixing until incorporated.  Repeat using half of remaining flour and all of remaining buttermilk mixture.  Scrape down sides of bowl and add remaining flour mixture; mix at medium-low speed until batter is thoroughly combined, about 15 seconds.  remove bowl from mixer and fold batter once or twice with rubber spatula to incorporate any remaining flour.  Divide batter evenly between prepared cake pans; smooth batter to edges of pan with spatula.

Bake cakes until toothpick inserted into center comes out with a few crumbs attached, 25-30 minutes.  Cool cakes in pans 15 minutes then invert onto wire rack.  Cool cakes to room temperature before frosting and you may even consider freezing for about 30 minutes before frosting.


Suggested uses:

Double Layer Birthday Cake: Decorate using Marshmallow Fondant or other frosting options. 

100_4496

100_4561

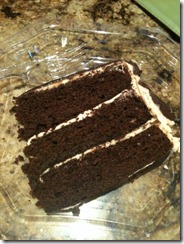
Chocolate Peanut-butter Cake (as seen on Smitten Kitchen):  Make a 3-layer chocolate cake.  Freeze the layers for 30 minutes – 1 hour before frosting.  Frost using  Peanut-butter Frosting between layers and on top and sides of cake.  Refrigerate at least 30 minutes.  Top with Chocolate/Peanut-butter Glaze by pouring (while warm) on top of cake (while cold) and spreading with off-set spatula so that it drips down the sides.  Refrigerate to set the frosting and glaze well.  Cut while cold and dip knife in water between cuts to keep the glaze from sliding around on you.

Peanut Butter Frosting

10 ounces cream cheese, room temperature
1 stick (4 ounces) unsalted butter, room temperature
5 cups confectioners’ sugar, sifted
2/3 cup smooth peanut butter, preferably a commercial brand (because oil doesn’t separate out)

In a large bowl with an electric mixer, beat the cream cheese and butter until light and fluffy. Gradually add confectioners’ sugar 1 cup at a time, mixing thoroughly after each addition and scraping down the sides of the bowl often. Continue to beat on medium speed until light and fluffy, 3 to 4 minutes.  Add peanut butter and beat until thoroughly blended.

Chocolate/Peanut-butter Glaze

8 ounces semisweet chocolate, coarsely chopped
3 tablespoons smooth peanut butter
2 tablespoons light corn syrup
1/2 cup half-and-half

In the top of double boiler or in a heat-proof bowl set over a sauce pan with 1 inch of simmering water (use the same set-up as for the cake), combine the chocolate, peanut butter, and corn syrup. Cook, whisking often, until the chocolate is melted and the mixture is smooth.  (You can always start this process in the microwave by cooking for about 30 seconds to get things started.  Once melted, it will be thick and dull.)  Remove from the heat and whisk in the half-and-half, beating until smooth and shiny. Use while still warm.

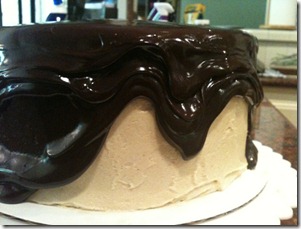
 chocolate pb cake 2 chocolate pb cake 1

chocolate pb cake 3

(Please excuse the picture quality.  All I had handy was my phone.)
Mocha Madness Ice Cream

from the King Arthur Flour website and blog

You may notice that there are not any pictures… it didn’t last long enough for me to take any.  There are some posted over on the King Arthur Flour site if you’re interested.  They also include some instructions for if you don’t have an ice cream maker.


Ingredients:

1 cup cold whole milk
3/4 cup sugar
2 tablespoons espresso powder
2 tablespoons dark or Dutch-process cocoa powder (sifted to remove lumps)
2 cups cold heavy/whipping cream
1 teaspoon vanilla extract
8 chocolate filled Oreo cookies, broken into small pieces


You will also need:

Stand mixer with whisk attachment or bowl and whisk
Ice cream freezer
Freezer safe plastic canister or container


Method:

Either with a stand mixer with whisk attachment or with a bowl and whisk in hand, mix together the milk, sugar, espresso powder and cocoa.  The sugar should be dissolved, the espresso powder should be fully incorporated and there may be just a little cocoa powder that is still floating on top.  Mix in the heavy cream and vanilla and whisk until a little frothy and everything is fully incorporated.

Freeze in ice cream maker according to manufacturer’s instructions.

Once it has reached “soft serve” consistency, add in the Oreo pieces and allow to mix until evenly distributed.  Immediately transfer to a freezer safe container (I like to use a plastic canister) and freeze for a minimum of 2-3 hours or overnight.

Eat.

Attend Mocha Madness Anonymous meeting.

Repeat.

Sweet Cherry Cobbler

Inspired by a combination of a Cook’s Illustrated recipe for Cherry Pie and the Cherry Cobbler recipe in my William’s Sonoma Essentials of Baking cookbook

100_8691

You can see my original post on my main blog here.

Most cherry pie/cobbler recipes are designed for sour or tart cherries which break down and release their juices easier than sweet cherries. A sweet cherry pie recipe from Cook’s Illustrated accounted for the smaller amount of juice released by sweet cherries in the cooking process by adding plum puree. After having tried the pie recipe, I decided to incorporate a few of the ingredients and techniques used to make a better cobbler. A cobbler full of flavor and juicy goodness.

And make a better cobbler it did.

Ingredients:

Filling:
6 cups sweet (i.e. Bing) cherries, stems removed and pitted
2 small red plums, pits removed
3 tablespoons sugar
¼ teaspoon table salt
1 ¾ tablespoons granulated tapioca
1 tablespoon lemon juice
¼ teaspoon ground cinnamon

Cobbler topping:
1 ½ cups all purpose flour
1/3 cup sugar
½ teaspoon table salt
1 teaspoon baking powder
½ teaspoon baking soda
½ teaspoon ground cinnamon
6 tablespoons butter, cut into small pieces
2/3 cup buttermilk
1 tablespoon sugar mixed with ¼ teaspoon ground cinnamon

You will also need:

Food processor or blender
Fine mesh strainer
Several bowls
Baking dish (I use a round 11” baking dish with sides 2” high)
Whisk
Rubber spatula/spoonula
Spring loaded scoop (ice cream scoop)

Method:

For the filling: Place the pitted plums (with skins) and about ½ cup of the pitted cherries in the food processor. Process about 1 minute, scraping down the sides as needed. Strain the purée through a fine mesh strainer into a large bowl, pressing on the solids to remove all the juice. Discard the solids. To the purée, add the sugar, salt, lemon juice, cinnamon and tapioca; stir to combine.

Take ½ cup – 1 cup of the pitted cherries and cut them in half then place all the cherries in the purée mixture. Stir to coat the cherries completely and let stand for 10-15 minutes.

Preheat your oven to 375ºF.

Place the cherry mixture in the baking dish; bake for 10 minutes while you prepare the topping.

For the topping: Combine the buttermilk and vanilla and set aside. In a large bowl, whisk together the flour, sugar, salt, baking powder, baking soda and cinnamon. Work the small pieces of butter into the flour mixture with your fingers until it resembles coarse crumbs. Pour the buttermilk/vanilla mixture into the flour mixture; fold and stir together with a rubber spatula just until the flour is completely and evenly moistened. It will be a soft, sticky and thick dough.

Remove the fruit from the oven and scatter spoonfuls (from your spring-loaded scoop) of the dough all over the top of the fruit. It should not cover completely as the dough will spread as it cooks. Sprinkle the cinnamon-sugar evenly over the top.

Return the cobbler to the oven and bake for 30-35 minutes. The cherry filling will be bubbling and the topping browned (a toothpick should come out clean).

Cool for 15 minutes on a wire rack.

Serve warm with ice cream.

Eat.

Repeat.

100_8694

Cupcake Cream Filling

I’ve tried a few cream filling recipes, but this one that I discovered over at Evil Shenanigans takes the cake…. or fills it.

 100_8439

Ingredients:

2 teaspoons hot water
1/4 teaspoon salt
1 – 7 ounce jar marshmallow cream
1/2 cup shortening
1/3 cup powdered sugar
1/2 teaspoon vanilla


Method:

Dissolve salt in hot water.  Whisk marshmallow cream, shortening, powdered sugar & vanilla with stand mixer until fluffy.  Whisk in salt water until incorporated & fluffy. 

Use a pastry bag fitted with a decorating tip poke a hole down into the cupcake and fill until a little peeks out the top.

One batch fills approximately 3 dozen cupcakes.

100_8417

Chocolate Cupcakes

adapted from Cook’s Illustrated

100_8433 

Cupcakes have become quite a trendy thing among adults and there has been an effort to find more adult flavors for cupcakes in the last year or two.   The original recipe from Cook’s Illustrated that I used for this recipe is for Dark Chocolate Cupcakes.  While I thought they were good as a more adult flavor, the dark chocolate flavor was a little too dark for the kids in my family.  And let’s be honest, for most of us, when we make cupcakes, it’s for the kids.  So I traded out the unsweetened chocolate for semi-sweet and the Dutch Processed or dark cocoa powder for regular cocoa powder.  The result was a chocolate cupcake with a good chocolate flavor that was pleasing to the general kid population and adults alike.

By the Cook’s Illustrated’s recipe, this makes exactly 12 cupcakes.  By my experience, however, if you take all the batter and divide it among 12 cupcake cups, you will have mushroom shaped cupcakes that are neither pleasing to look at nor are they easy to frost.  In my experience, this recipe makes an odd 13 cupcakes.  SO, if you have a way to make 13.  Or make 12 and you will have a bit of batter left over.  Regardless, I highly discourage using all the batter in 12 cups.  I’ve done it.  It’s not pretty.

Ingredients:

8 tablespoons unsalted butter
2 ounces semi-sweet chocolate
1/2 cup cocoa powder (1 1/2 ounces)
3/4 cup all purpose flour (3 3/4 ounces)
1/2 teaspoon baking soda
3/4 teaspoon baking powder
2 large eggs
3/4 cup granulated sugar (5 1/4 ounces)
1 teaspoon vanilla
1/2 teaspoon salt
1/2 cup sour cream


You will also need:

Heat-proof bowl
Sauce pan
Mixing bowl
Cupcake pans
Paper cupcake baking cups


Method:

Preheat oven to 350 degrees F.

Combine butter, chocolate and cocoa powder in heat-proof bowl and set over a small amount of barely simmering water in a sauce pan and allow to fully melt and combine until smooth.  (To quicken the process, you can melt the butter in the microwave and pour it over the chocolate and cocoa to begin the melting process sooner.)  Once melted, set it aside to cool for a few minutes until just warm to the touch.

Meanwhile, in a small bowl, whisk together the flour, baking soda and baking powder and set aside.

In a large mixing bowl, whisk eggs until smooth.  Add sugar, vanilla and salt and whisk until fully combined and smooth.  Add cooled chocolate mixture and whisk until combined.  Sift in 1/3 of the flour mixture and whisk to combine.  Whisk in sour cream then sift remaining flour mixture over and whisk until batter is homogenous and thick.

Using a large scoop, place 1 just over-full scoop into each cupcake liner.  The recipe makes 13, so if you only have room for 12 cupcakes, you will have a bit left over.

Bake 18-20 minutes at 350 degrees F.

Allow to completely cool before filling and/or frosting.

~~~~~~~~~~

Melt your chocolate and butter until smooth.

100_8395

Whisk the eggs, then whisk in the sugar, salt & vanilla.

100_8396 100_8397 100_8398

Whisk in the melted chocolate and then the flour and sour cream until thick and homogeneous.

100_8399 100_8400

100_8401 100_8402

100_8403 100_8404

 100_8406

Fill your spring loaded scoop until just over-full.

100_8408100_8409

Believe it or not, it makes 13 cupcakes.  If you try to divide the batter between only twelve cups, they run over the tops they look like this….

100_8223

when they should look like this…

100_8416

Nana’s Buttermilk Pie

Few things speak to this Texan’s heart like pie. And one that truly takes me back to my childhood is my Nana’s buttermilk pie. I wrote a post about Buttermilk Pie on my main blog. You can read it here.

Buttermilk Pie Strawberries

Ingredients:

3 eggs
1 ½ cups sugar
6 tablespoons (¾ stick) butter (melted)
¾ cup buttermilk
¼ teaspoon salt
1 teaspoon vanilla

You will also need:

9” pie plate
1 unbaked pie crust (your favorite recipe)
Stand mixer

Method:

Preheat oven to 350 ºF.

Cream together eggs & sugar using the paddle attachment of a stand mixer. Drizzle in melted butter & mix well. Add buttermilk, salt and vanilla. Pour into an unbaked pie shell.

Bake @ 350 for about 40-45 minutes or until set. (The top will form a little bit of a crust, so it may be difficult to tell, but you do not want to over-bake. I would be hesitant to cook longer than the 45… maybe 46 minutes.)

Cool completely. It is best when made ahead of time and refrigerated to allow the custard to really set up. Serve either cold from the refrigerator or at a cool room temperature.

Now, with pictures:

Cream together eggs & sugar using the paddle attachment of a stand mixer.

100_7882 100_7883

You want to drizzle in melted butter in case it is still hot. You don’t want to chance dumping it all in at once and curdling the eggs.

100_7884

Add buttermilk, salt and vanilla.

100_7885

Mix until just a little frothy… you want to see a few bubbles on top.

100_7886

Pour into an unbaked pie shell.

100_7887 100_7888

Bake @ 350 for about 40-45 minutes or until set. (The top will form a little bit of a crust, so it may be difficult to tell, but you do not want to over-bake. I would be hesitant to cook longer than the 45… maybe 46 minutes.)

Buttermilk Pie Whole

Refrigerate before slicing and serving for best results.

Buttermilk Pie Slice

For very clean-cut pieces, cut when cold out of the refrigerator. At room temp, the crust on top will shred just a little (see the picture with strawberries at the top of this post) and the custard might loosen up a little. It still tastes wonderful, it just gives the piece of pie a little more rugged look.

Variations:

  • Serve with some fresh macerated berries.
  • Add 1/8 teaspoon of ground nutmeg to the custard.
  • Add 1 tablespoon of lemon juice and/or 1 tablespoon of finely grated lemon zest to the custard.
  • Add 1/2 cup shredded coconut to the custard.